
SNC SAProuter: Step-by-Step Technical Guide 2025
Introduction
Welcome to our comprehensive guide on how to configure SNC SAProuter on Windows actively! In this guide, we will empower you with the knowledge and practical steps required to enhance the security of your SAP system. By implementing SAProuter SNC, you will effectively shield your SAP environment from unauthorized access and potential data breaches.
In today’s dynamic digital landscape, safeguarding your sensitive business data is non-negotiable. Cyber threats relentlessly target vulnerabilities, making it essential for you to take proactive measures. This guide is your roadmap to actively fortify your SAP system’s defenses and ensure that your valuable data remains protected.
So, let’s roll up our sleeves and actively dive into the world of SAProuter SNC configuration!
Planning
Pre-requisites
Downloading Required Software
SAP Client Copy involves copying data from one SAP client to another. It is used to is to create a new SAP client with the same data as the source client, which can be used for testing, training or as a backup.
- Log in to the SAP Support Portal using the S-User ID assigned to your installation.
- Download the latest SAProuter version, which can be downloaded from the SAP Software Download Center. On Support Packages & Patches tab click: A-Z Alphabetical Products List –> S > SAProuter –> SAProuter (latest versions) –> Select OS –> Select saprouter_xxxx-xxxx.sar –> Download Basket button
- To set the environmental variable, implement SAP Note 1553465
- Download the latest SAP Cryptographic library. In SAP support portal navigate to – On Support Packages & Patches tab click: A-Z Alphabetical Products List –> S > SAPCRYPTOLIB –> COMMONCRYPTOLIB (latest version) –> Select OS –> Select SAPCRYPTOLIBP_xxxx-xxxx.sar –> Download Basket button.
- Download the SAPCAR.exe executable from the SAP support portal, which is required to unpack the .sar archive that is downloaded.
Registering IP and Hostname with SAP
- First get the public IP address from the network team. This public IP address needs to be configured to your local SAProuter IP address. (This task will be carried by the network team).
- Get ports 3299 and 3298 open from SAProuter IP host to SAP network.
- Follow SAP Note 28976 and complete the registration form for the new SAProuter installation.
Configuring SNC SAProuter: Step-by-Step
1. Create a folder named ‘saprouter‘ under C:\usr\sap\<SID>\saprouter directory
2. In this directory, uncar the SAProuter and SAPcryptolib .SAR files using the SAPCAR executable as below:
- sapcar.exe -xvf saprouter_xxxx-xxxx.sar
- sapcar.exe -xvf sapcryptolibp_xxxx-xxxx.sar
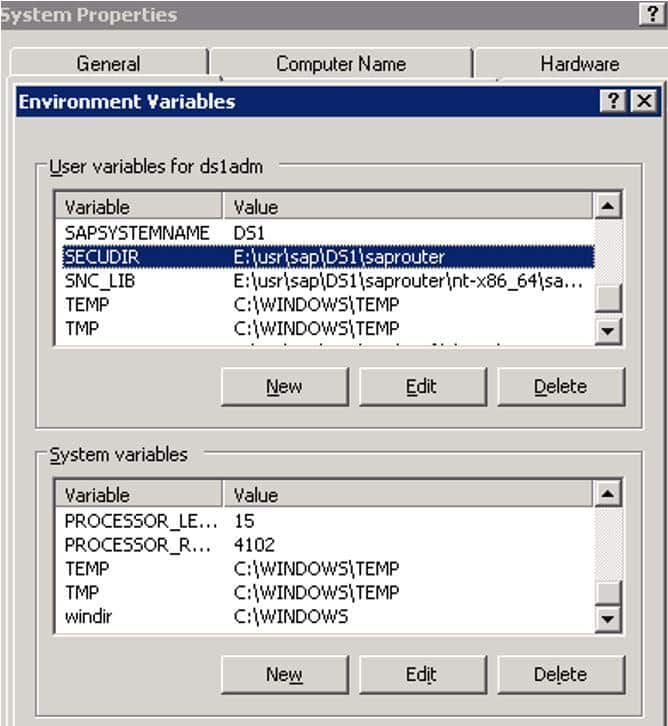
3. Login as <sid>adm and set environment variables SNC_LIB and SECUDIR.
- SECUDIR = C:\usr\sap\<SID>\saprouter
- SNC_LIB = C:\usr\sap\<SID>\saprouter\sapcrypto.dll
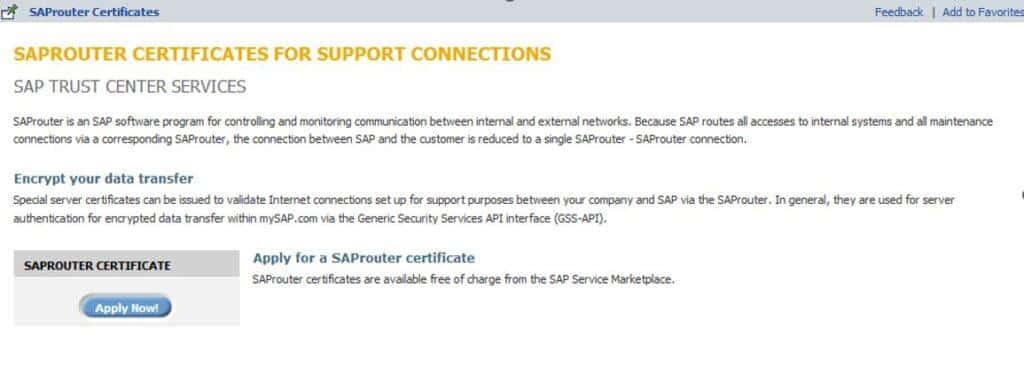
4. Visit the SAProuter application and click on “Apply Now” button
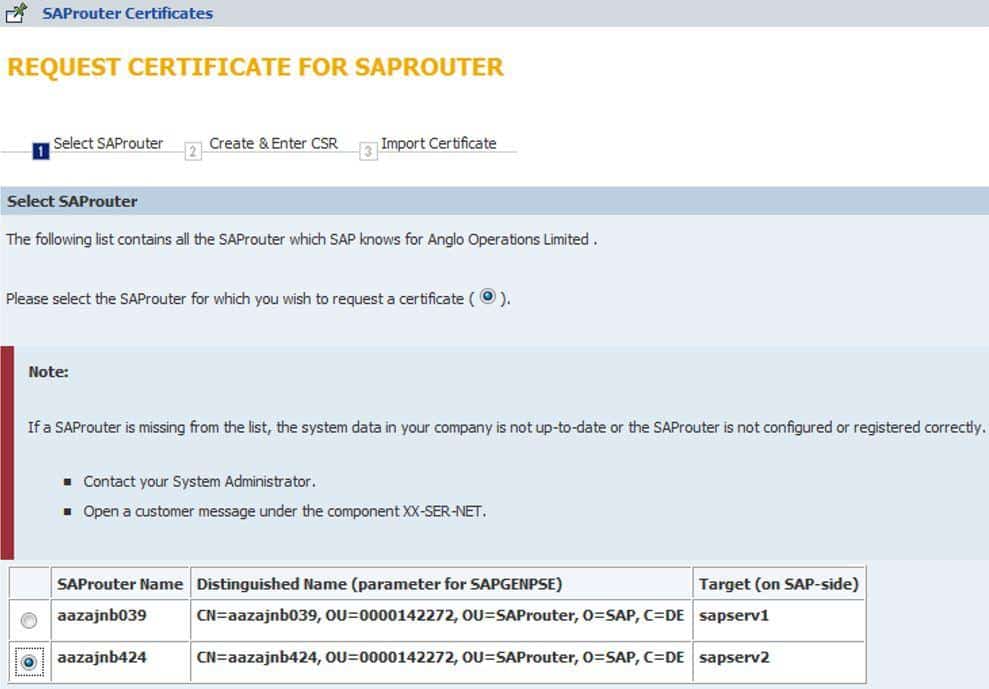
Select the appropriate SAProuter from the list of SAProuter’s that are registered to your installation.
5. Generate the certificate with the below command
- Syntax
- sapgenpse get_pse -v -onlyreq -r certreq -p local.pse “<Distinguished Name>”
- Example: In our case, it will be
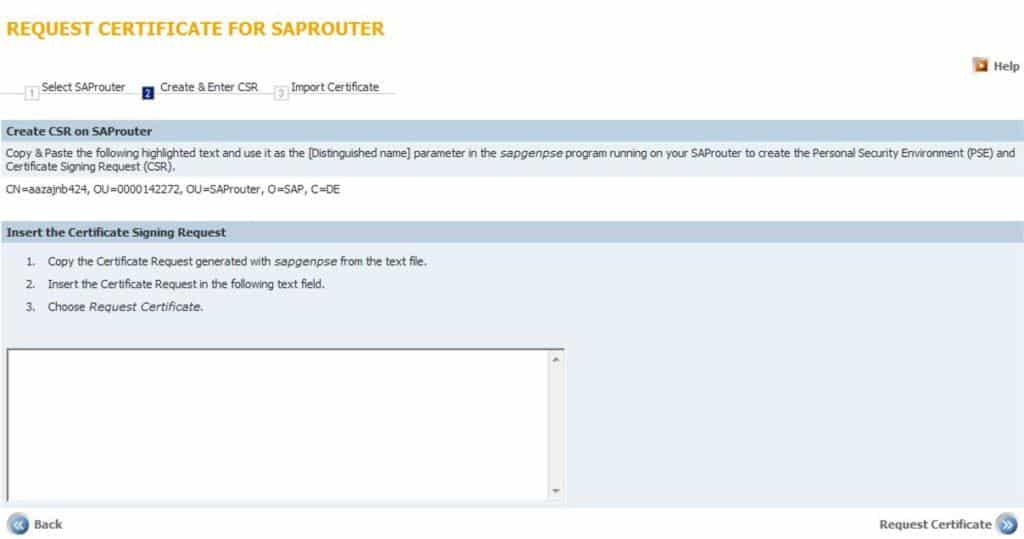
- sapgenpse get_pse -v -r certreq -p local.pse “CN=aazajnb424, OU=0000142272, OU=SAProuter, O=SAP, C=DE”
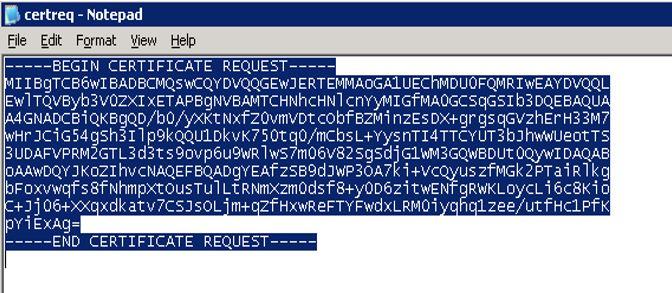
6. Show the “certreq” output file and copy and paste the certificate request (including the BEGIN and END statements) into the text area of the SAProuter application where you copied the “Distinguished Name.”

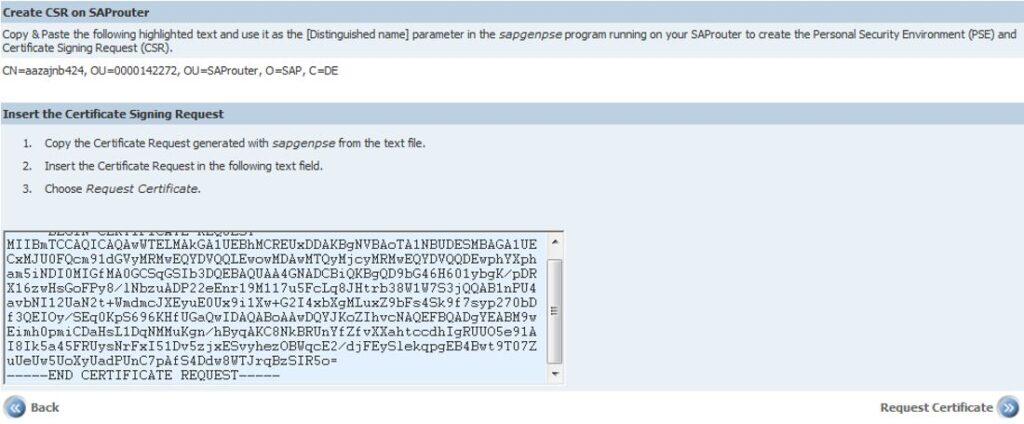
7. Once you “Request Certificate“, you will receive a request signed by the CA in SAP Support Portal.
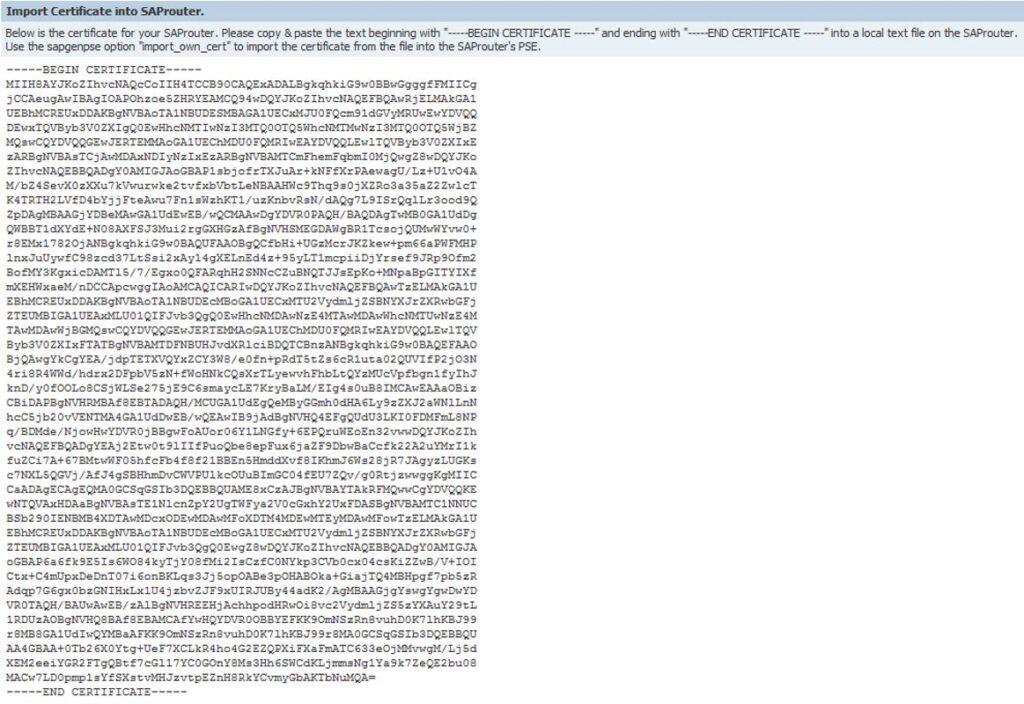
8. Copy & paste the text to a new local file named “srcert“, which must be created in the same directory as the sapgenpse executable.
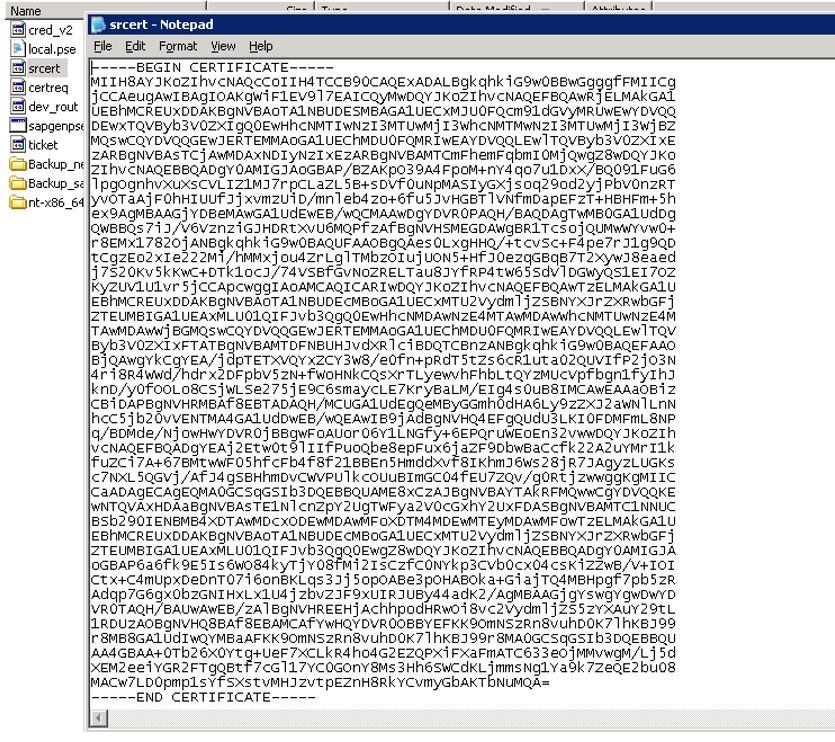
9. You can then install the certificate in your SAProuter by calling:
- sapgenpse import_own_cert -c srcert -p local.pse -x <pse password>
10. Now, you need to use the same program to create credentials for the SAProuter (if you leave out -O <user_for_SAProuter>, the credentials are created for the user account that is logged in):
- sapgenpse seclogin -p local.pse -x <pse password> -O <user_for _SAProuter>
11. A new file named “cred v2” will be generated in the same folder of “local.pse“
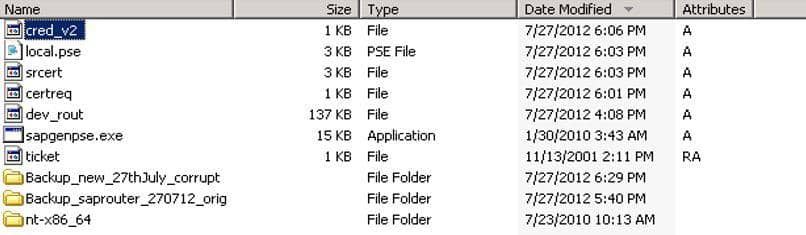
12. Validate the import status of the certificate with the following command:
- sapgenpse get_my_name -v -n Issuer
The issuer name should be: CN=SAProuter CA, OU=SAProuter, O=SAP, C=DE
13. If the output is different than the above, then delete the “cred v2“, “local.pse“, “srcert“, and “certreq” files and begin again from the start. If the output still does not match, open an issue using component XX-SER-NET and include the output of the sapgenpse commands you have executed.
Starting SAPRouter: Pre-Checks
The corresponding saprouttab file (local notepad file) that must be manually created in the main SAProuter directory, must contain at least the following entries.
Example SAPROUTTAB for SNC connections: (SAP Router IP Address: 194.39.131.34)
- # SNC connection to and from SAP
- KT “p:CN=sapserv2, OU=SAProuter, O=SAP, C=DE” 194.39.131.34 *
- # SNC connection to local system for SAP-Support ( # SAP Server: 192.168.13.10; SAP Instance: 00)
- KP “p:CN=sapserv2, OU=SAProuter, O=SAP, C=DE” 192.168.13.10 3200 (optional SAProuter password)
- # SNC connection to local Portal system for URL access, if applicable
- # Portal server: myserver.mydomain; # Port number: 50003
- KP “p:CN=sapserv2, OU=SAProuter, O=SAP, C=DE” myserver.mydomain 50003
- # Access from the local Network to SAP
- P 192.168.*.* 194.39.131.34 3299
- # Deny all other connections
- D * * *
Starting the SAProuter
For instructions on how to start SAProuter on Windows platform, follow the detailed instructions as described in the SAP Note 525751.
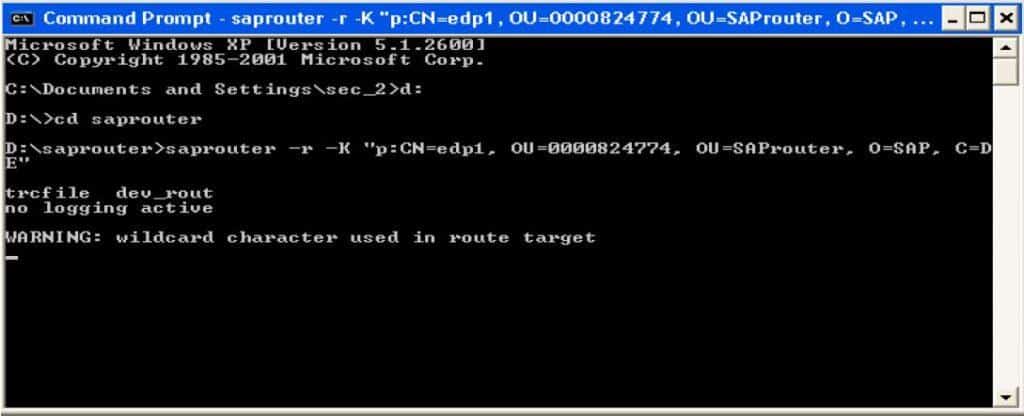
Start the SAProuter using the following command line.
saprouter -r -K “p:CN=<example>, OU=<customer number>, OU=SAProuter, O=SAP, C=DE”
Example:
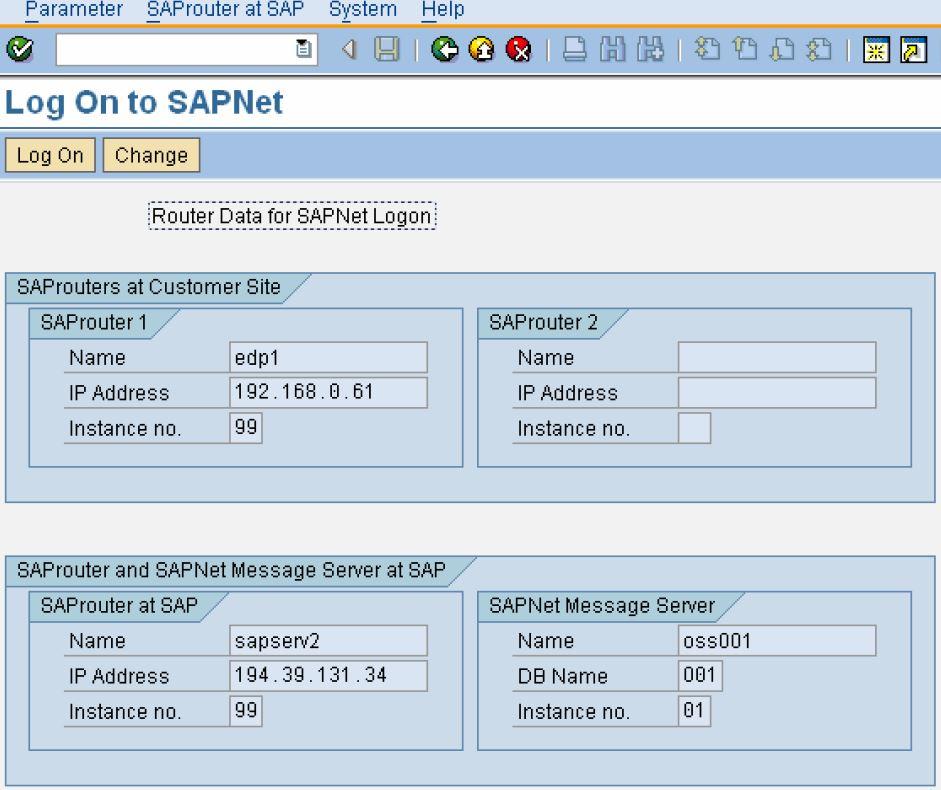
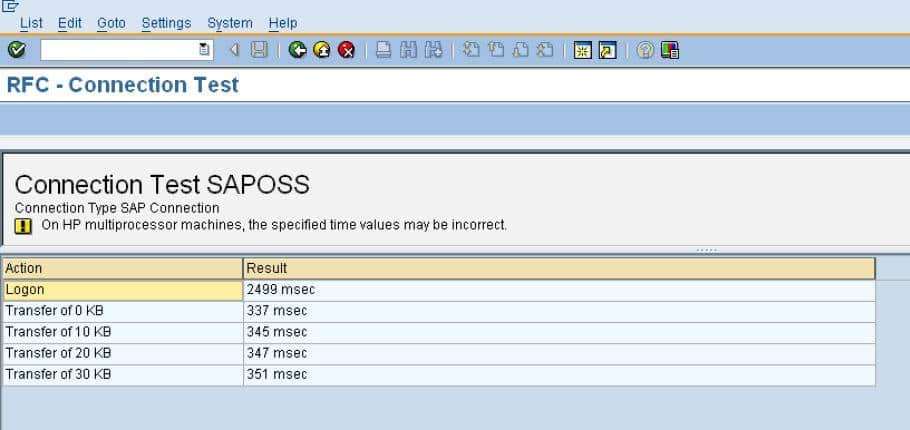
Establish Remote Connectivity With SAP
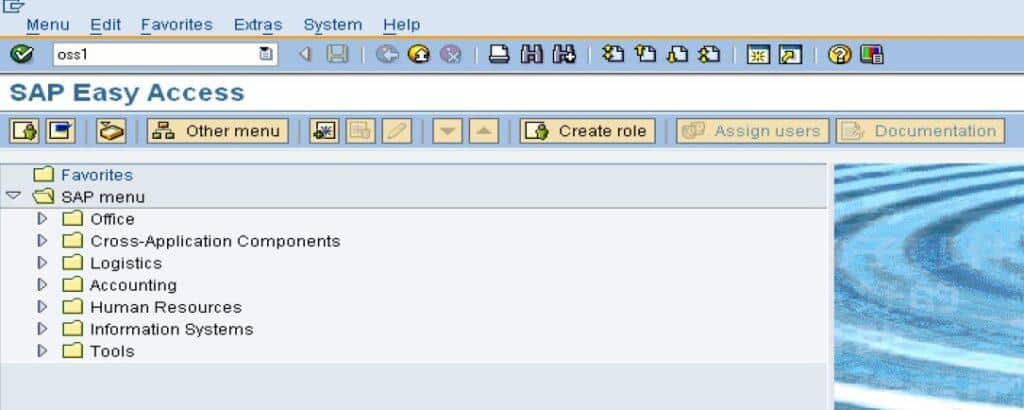
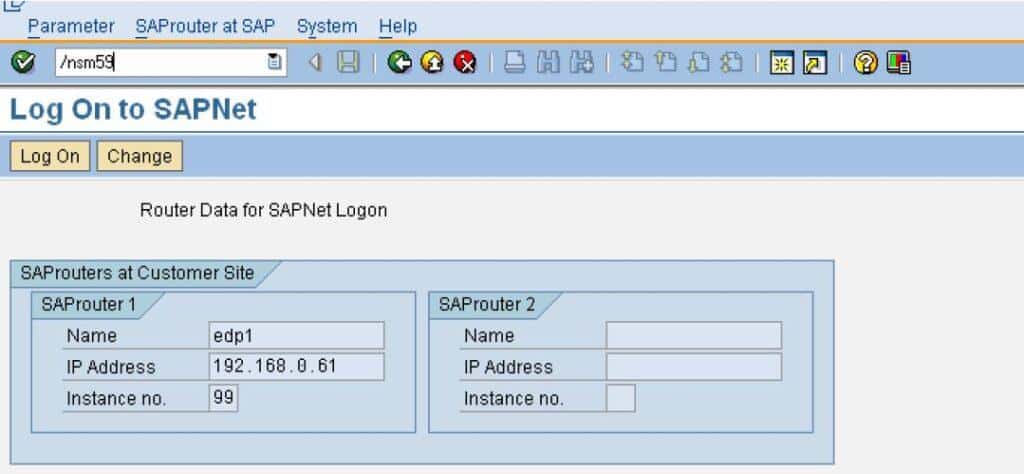
- Log on to SAP system and execute SAP transaction code OSS1.
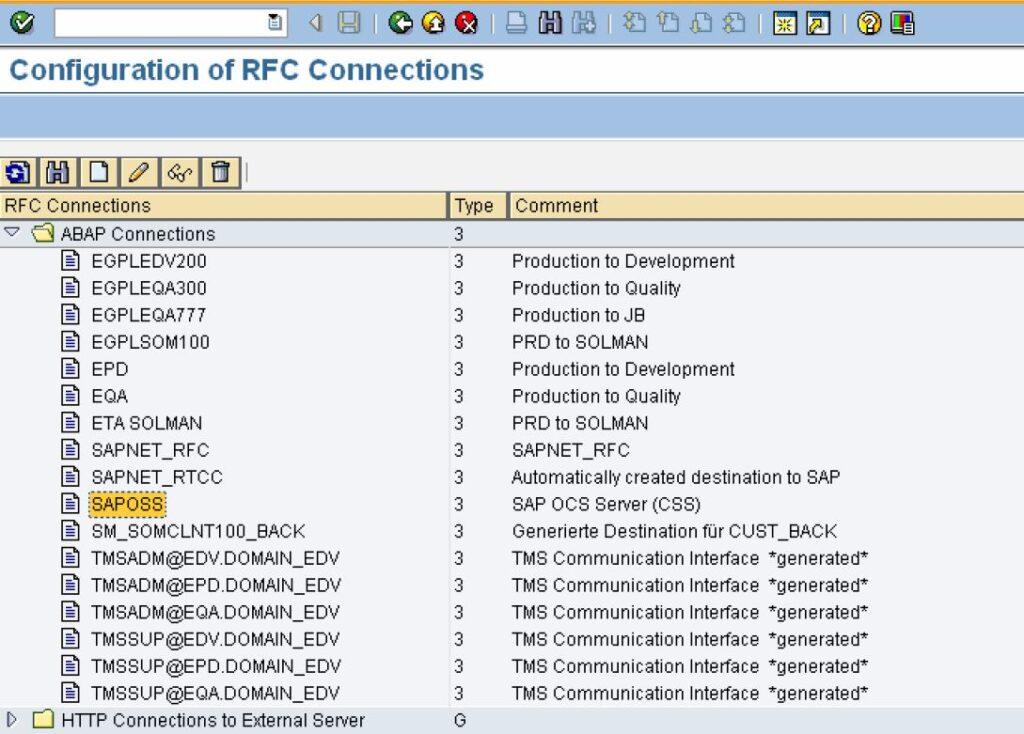
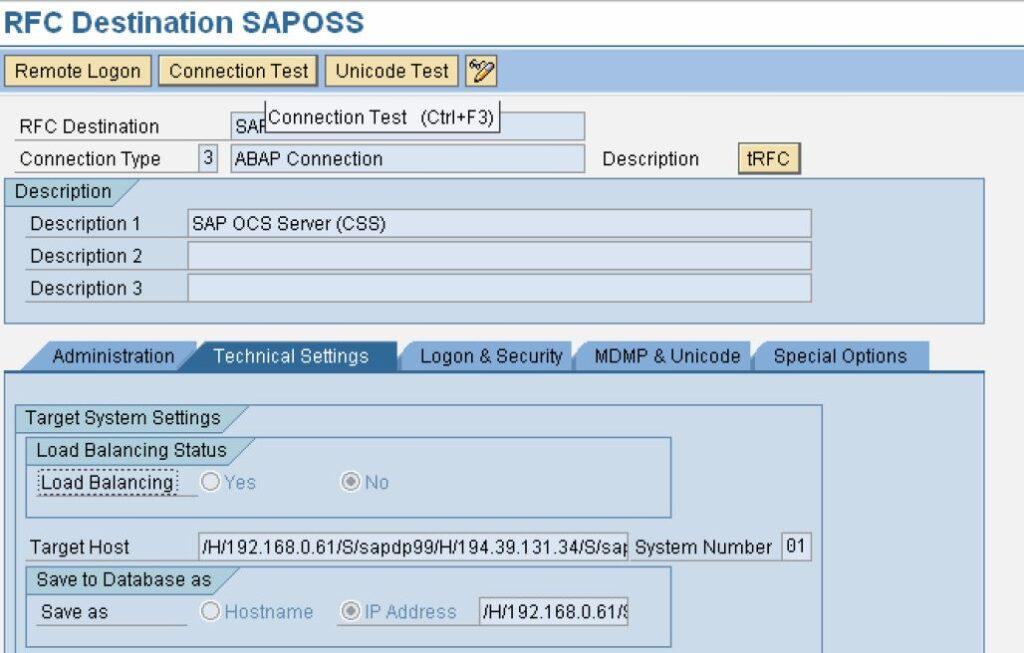
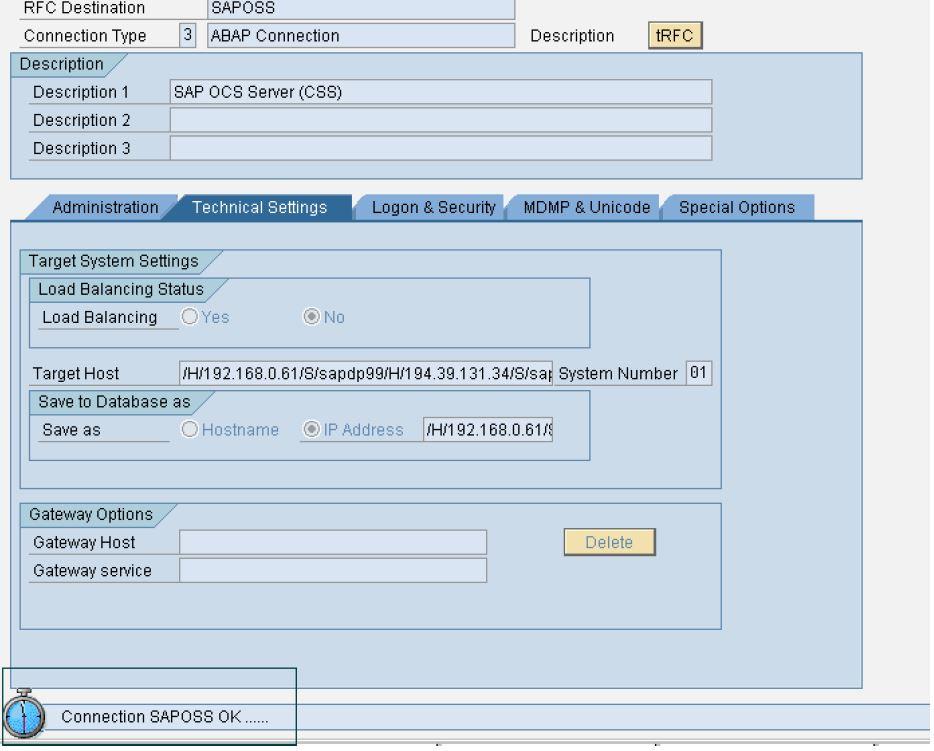
- To establish RFC connection using SAP transaction code SM59.
Conclusion
In summary, the process of configuring SAProuter with SNC on Windows demands a thorough and meticulous approach, and a strict adherence to the step-by-step guidelines as presented in this guide. Implementing SNC can offer an extra layer of security for SAP communication and helps safeguard against potential data breaches. By following the instructions laid out here, users can ensure a successful SNC configuration on their Windows system, and thereby enhance the overall security of their SAP environment.
We recommend that users conduct regular reviews and updates of their SNC configuration to maintain the highest level of security possible. By implementing these practices, Users can have peace of mind about the safety and security of their SAP system.